Setting Up an OpsWorks Stack for Prerender
Prerender is an open source tool for making single page applications available for search engine indexing. It runs as a Node.js server that can easily be deployed to Heroku, which is how we were using it for PartCycle.com before moving to AWS. There is also the option of subscribing to the Prerender.io service and skipping hosting altogether.
Self-hosting with Heroku would probably be more than adequate for most people using prerender. However, for large e-commerce applications where there might be hundreds of thousands or even millions of items available (and thus unique content URLs), handling the volume of Google bot requests can become quite expensive.
Thankfully Amazon Web Services comes to the rescue with their cheap but powerful EC2 instances. Using OpsWorks, it is fairly straightforward and painless to configure a small, scalable prerender cluster that can can handle rendering hundreds of pages per minute at a fraction of the cost of an equivalent Heroku configuration.
Requirements & Disclaimers
In order to follow these instructions as described, you will need to have accounts set up for the following services:
Also be aware that adding the Elastic Load Balancer and EC2 instance(s) in your AWS account may (and most likely will) subject your account to significant charges if the configuration is left in place for any length of time. Please review AWS pricing to determine if the estimated costs make sense for your application.
Fork prerender
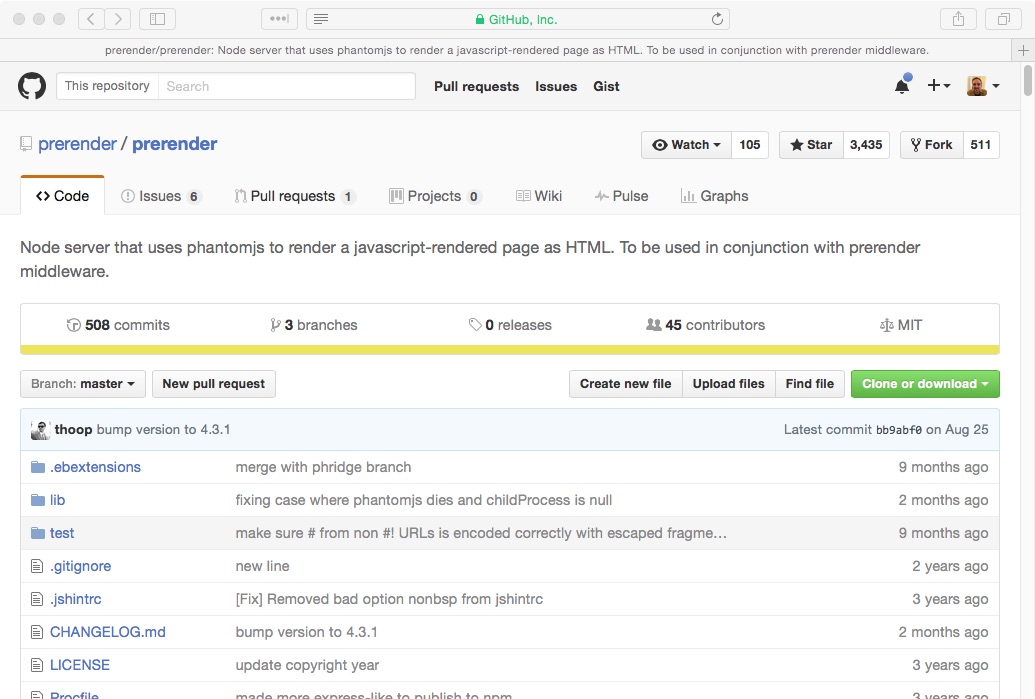
You will need to create your own fork of the prerender server so that you can do things like customize the server configuration and add a deploy key. The easiest way to do this is to visit the source repository for prerender and click the Fork button in the upper right corner.
Hack the prerender app
Once you have your fork, we need to make an adjustment to how prerender handles our requests. Prerender looks at the URL requested to determine the page address that needs to be rendered. For example, http://my-preprender-service.com/https://www.google.com would tell prerender to return the rendered HTML for https://www.google.com. If no page address is specified, prerender returns a 404 error.
Both the AWS Elastic Load Balancer and the OpsWorks Application Layer are going to be performing health checks on the root URL (/) of the prerender app. If they get 404 responses they will think our prerender instance is not healthy and that will cause problems. We’ll fix that in our fork of prerender by capturing those requests and returning a 200 status with a helpful message.
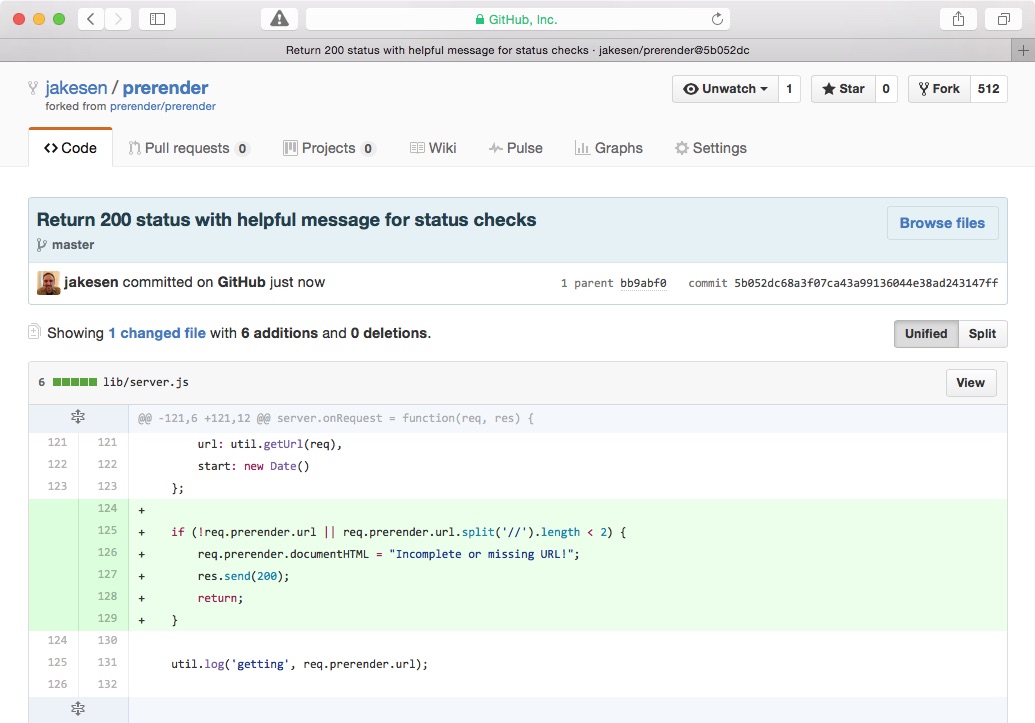
The following needs to be added to lib/server.js just after line 124 in the server.onRequest function:
if (!req.prerender.url || req.prerender.url.split('//').length < 2) {
  req.prerender.documentHTML = "Incomplete or missing URL!";
  res.send(200);
  return;
}
Here is a screenshot of the commit diff:
You can also make modifications to the root server.js file to customize your prerender server with things like caching, whitelisting, etc that I won’t go into here. You can read the prerender documentation to learn more about that.
Add deploy key
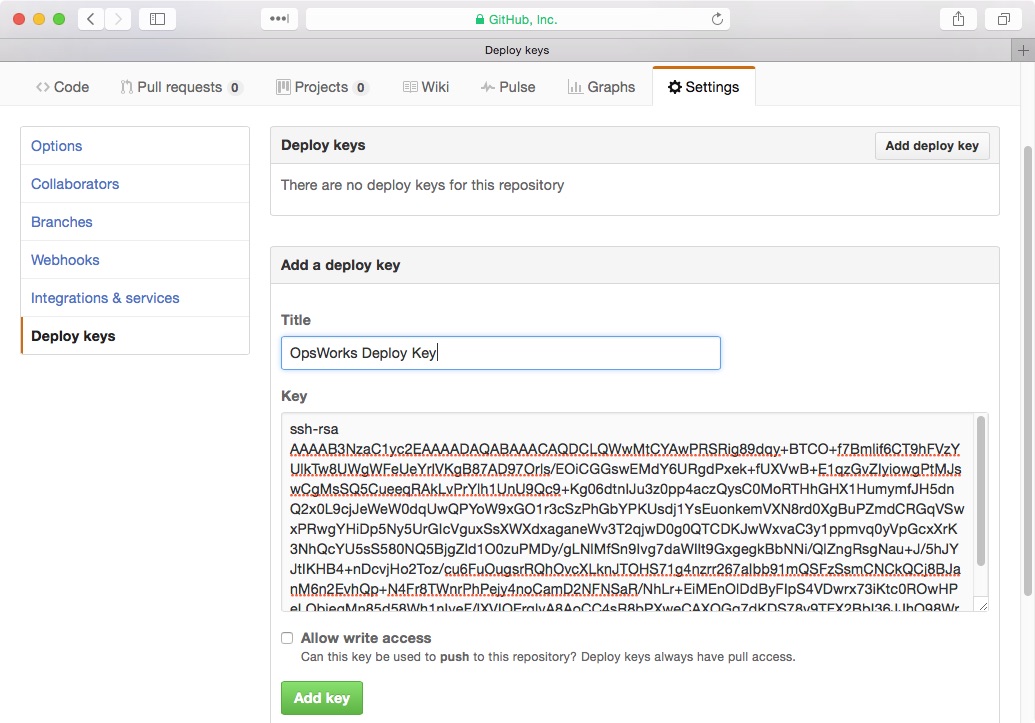
Add a deploy key to your prerender repo. If you need to create a key, you can follow GitHub’s instructions.
Create a Stack
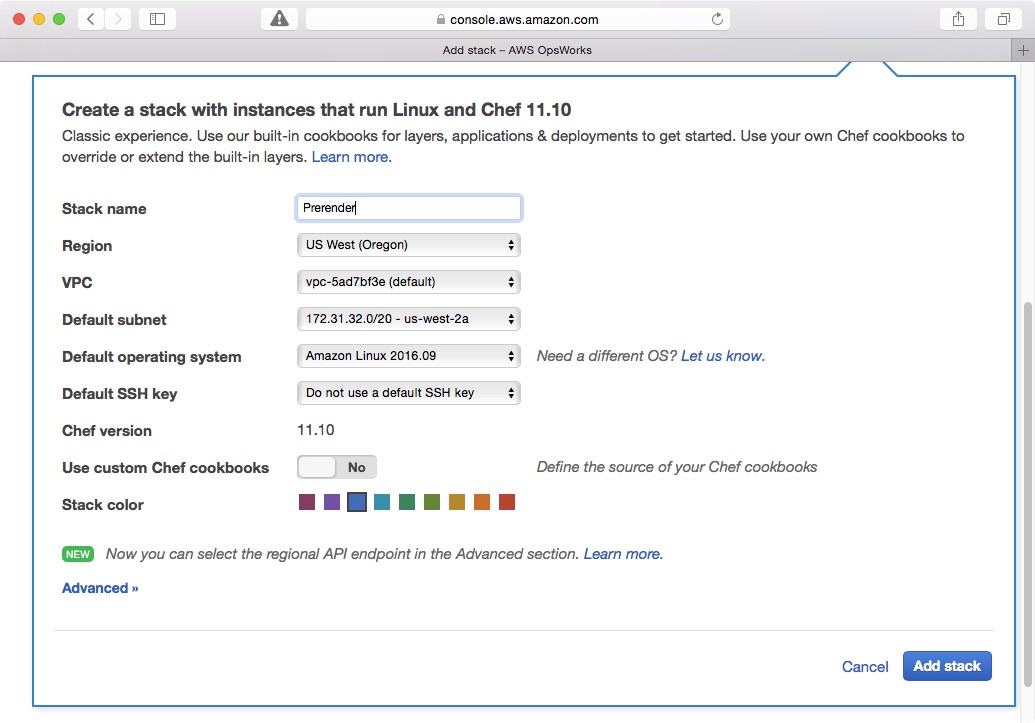
Now we can head over to the AWS Management Console and start setting up our OpsWorks stack. First, make sure you have a VPC configured for your load balancer and EC2 instances to live in. A new VPC with the default settings should suffice. Go to the dashboard for the OpsWorks AWS service and click Add Stack. Choose the Chef 11 stack option and fill in the name for the new stack. The other values can be left on their default settings. Click Add stack to continue.
Before doing anything else, we’ll go create our load balancer so that it will be ready for association with our OpsWorks Layer. Because we created the stack first, AWS should have automatically created the OpsWorks security group that we’ll need to use with the load balancer.
Add a load balancer
After the stack has been added, go to the AWS dashboard for EC2 and click Load Balancers from the left hand navigation bar. Click Create Load Balancer. Choose the type of load balancer you want. I used the Classic Load Balancer. Give it a name and associate it with your VPC. You will need to do additional configuration if you want prerender to handle HTTPS requests…I only set it up for HTTP.
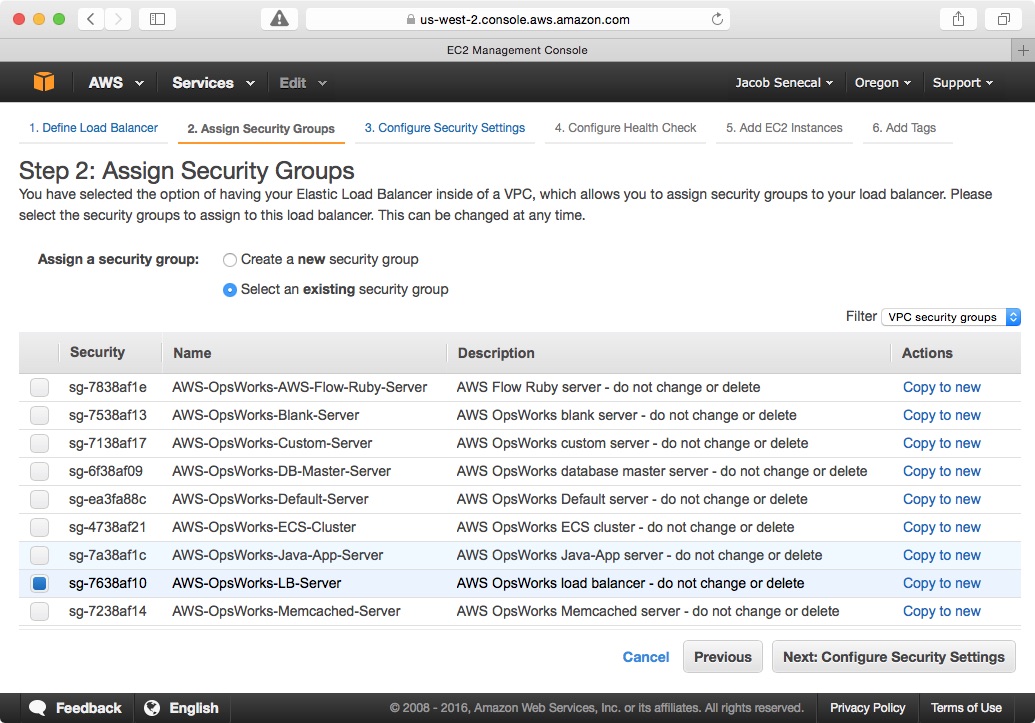
The next step is to select security groups for the load balancer. Fortunately, OpsWorks has already created an appropriately configured group for us.
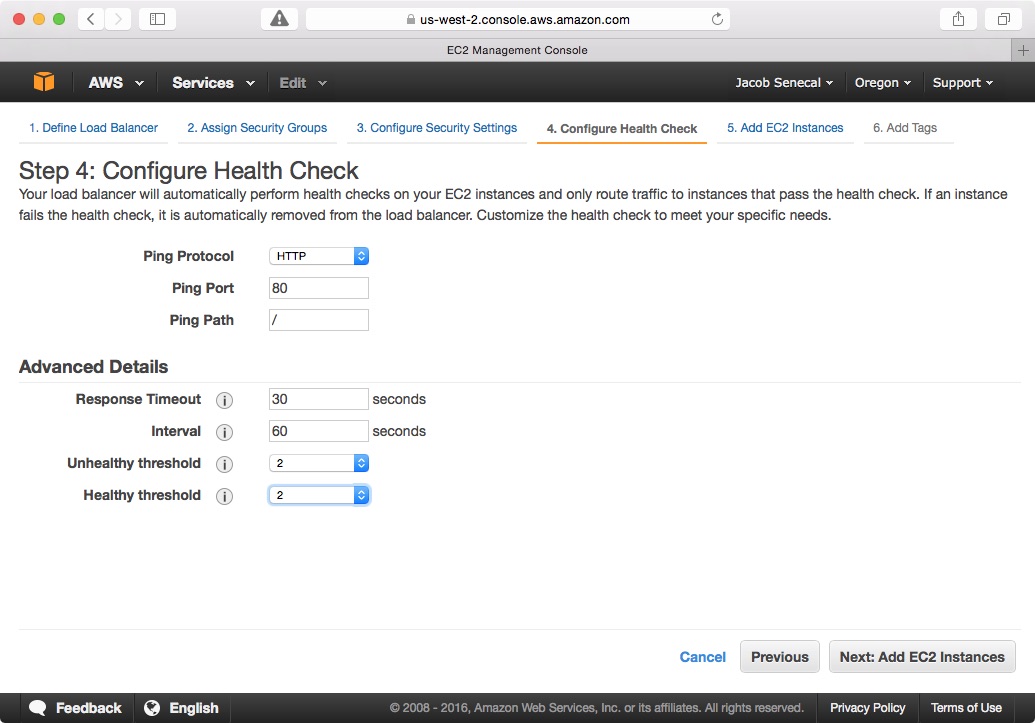
From there you can move ahead to the health check configuration. The best values to use here may somewhat depend on your application. If these health checks fail for one of our prerender instances, the load balancer will stop sending traffic to it until it starts passing again. This is important because if your stack has no instances that are passing the health checks your prerender service will not be available! The following health check settings worked well for me:
We don’t really need to worry about adding instances or tags right now, so you can skip through the rest of the steps until you get to the final review step and complete the creation of the load balancer.
Add Node.js Layer & Instance
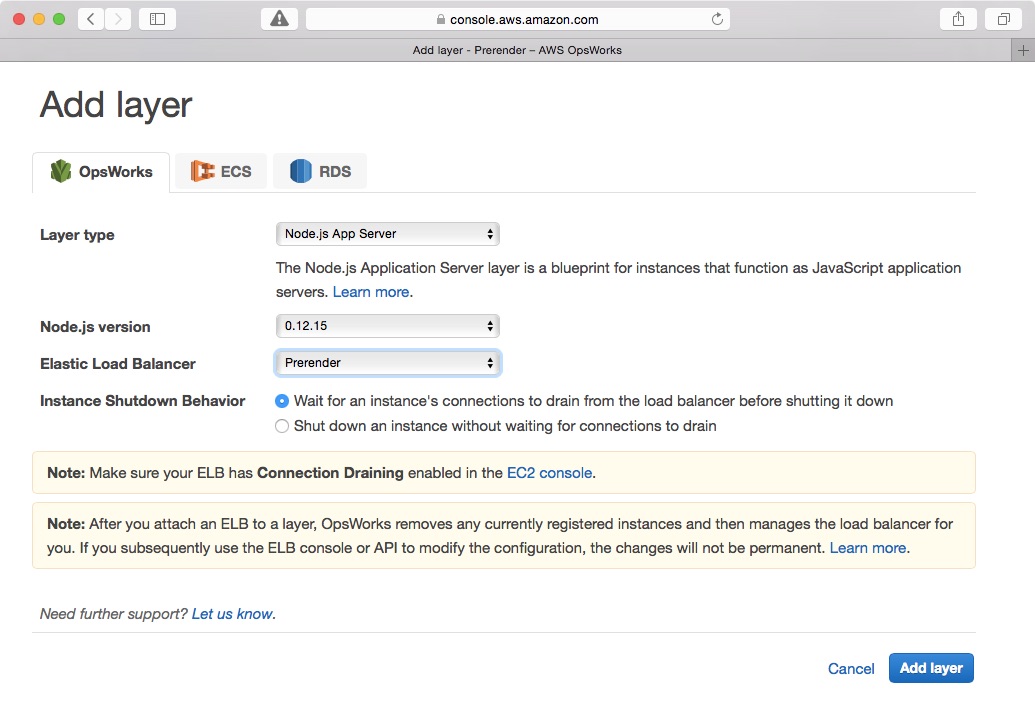
Now we head back to the OpsWorks stack and add a Layer for managing our prerender instances. Click the Add Layer link and choose the Node.js App Server option and the load balancer you just created.
Once the layer has been added, go ahead and add at least one instance to the layer. The c3.large and c4.large seem to work well, but your mileage may vary.
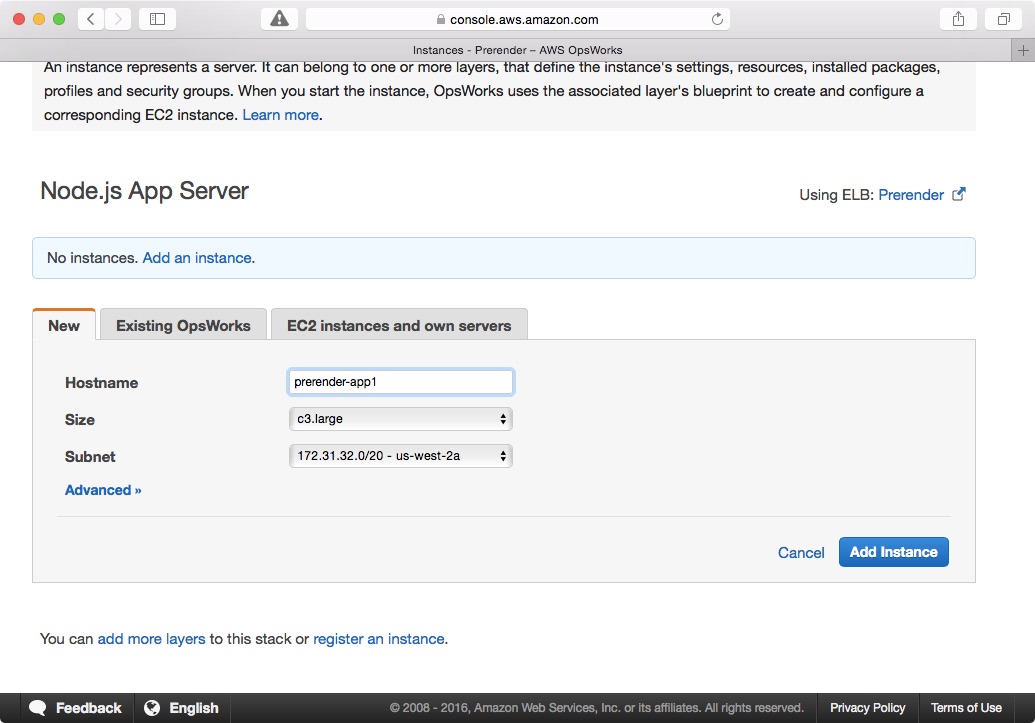
Once the instance has been added, click Start to bring the instance online.
Add App config to stack
Navigate to the Apps section of the OpsWorks dashboard and click Add app. Enter a name for the app (Prerender?) and select Node.js for the type. You will need to enter the ssh link for your prerender forks’s GitHub repo, along with the private key part of your deploy key. Finally, enter the environment variables needed to configure prerender. PRERENDER_NUM_WORKERS and PRERENDER_NUM_ITERATIONS are optional, but very useful for tuning memory and CPU usage on your instances. NODE_HOSTNAME needs to be set to 0.0.0.0 for prerender to work in the OpsWorks Node.js layer.
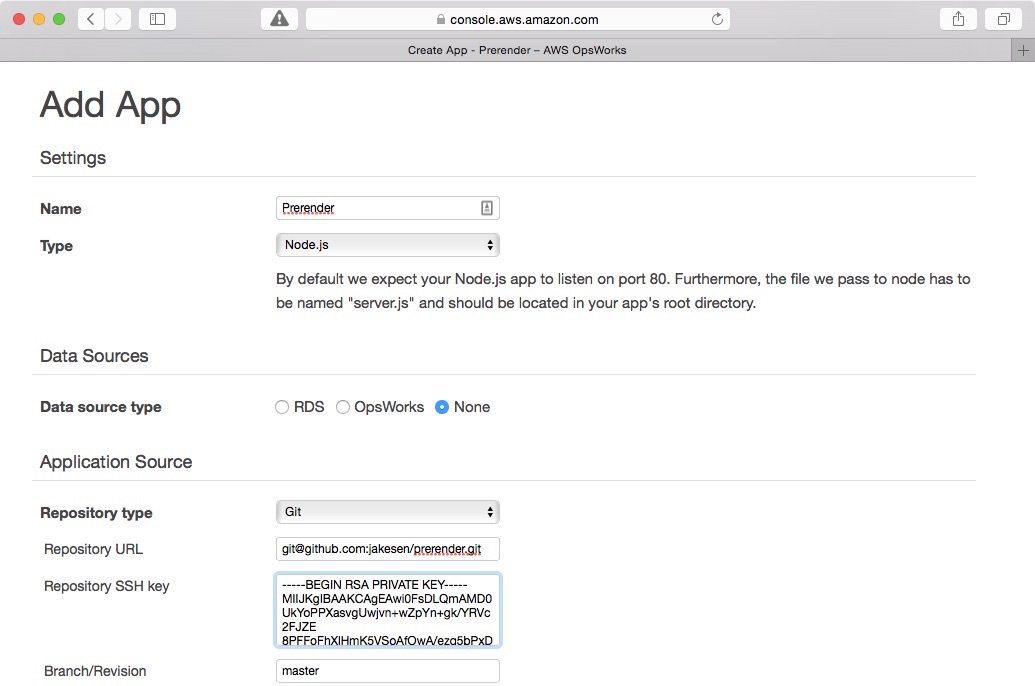
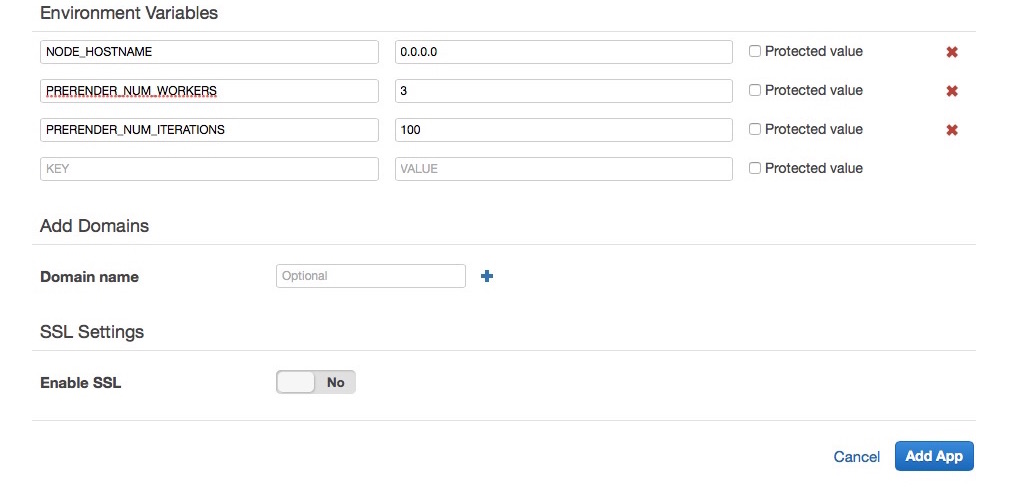
Once the App has been added, you will need to Deploy it to the instance(s) that were created in the Node.js layer. Once deployment has completed and the load balancer has established that the prerender instance is healthy, you will be ready to prerender some pages!
Testing
You can find the URL for your prerender service in the Layers section of the OpsWorks dashboard. If you open the link in your browser, you should see a page with the text Incomplete or missing URL! (from our hack :-D).
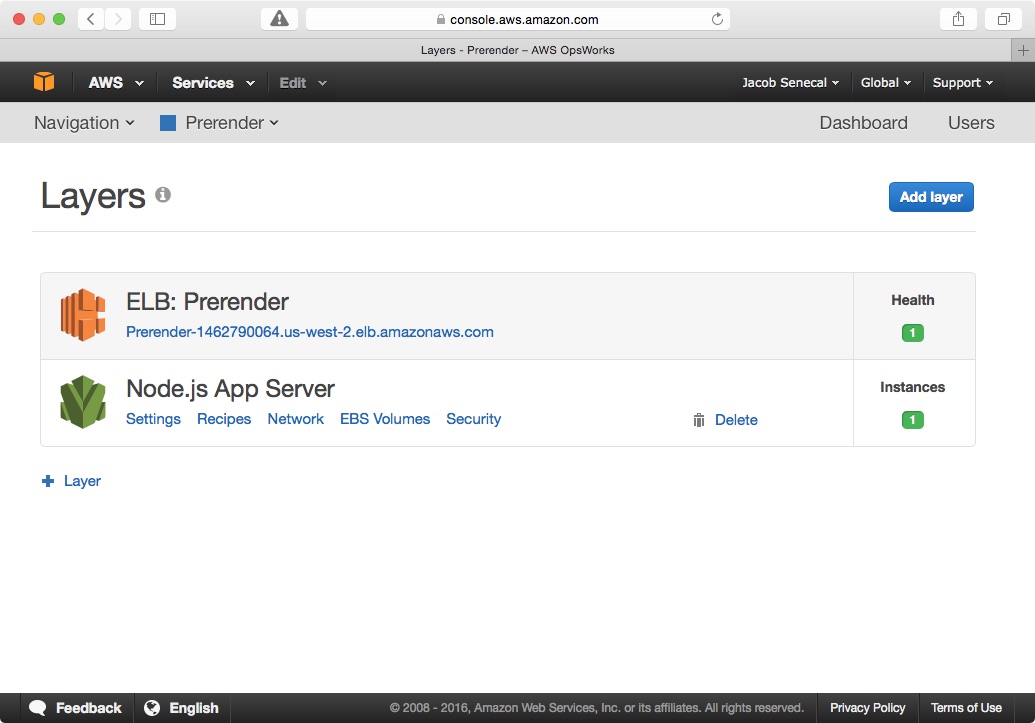
Now try adding another address onto the end of the URL, like maybe https://www.google.com/search?q=prerender. You should see the prerendered page in your browser. If you view the source HTML, you should see that there is no javascript content at all, since prerender is only returning the pre-processed DOM state.
Conclusion
Prerender and OpsWorks make a great combo and the monthly costs are a super deal if you need to handle a high volume of pages. PartCycle would have spent over $1,000 per month for a Heroku configuration that could handle the same load as our ~$200 per month OpsWorks stack. It did take a little bit of work to figure out how to configure it with Amazon’s Node.js layer, but is was worth the effort and hopefully others can benefit from what I’ve learned.